
PDF chapter test TRY NOW
We have already studied the converging and diverging nature of spherical lenses.
Now let us look at the activity that explains the image formed by the convex lens.
- Take a convex lens.
- Draw five parallel straight lines on a long table with chalk so that the distance between the successive lines equals the focal length of the lens.
- Place the lens on a lens stand.
- Place it so that the optical centre of the lens is just over the line on the central line.
- The two lines on either side of the lens correspond to \(F\) and \(2F\) of the lens, respectively.
- Mark them with the appropriate letters, such as \(2\), , , and \(2\). Place a burning candle far to the left of \(2\).
- On a screen on the other side of the lens, get a clear, sharp image. Make a note of the image's nature, location, and relative size.
- Place the object behind \(2\), between and \(2\), at , and between and \(O\) to repeat the activity.
- Make a list of your observations and tabulate them.
Image formation by convex lenses:
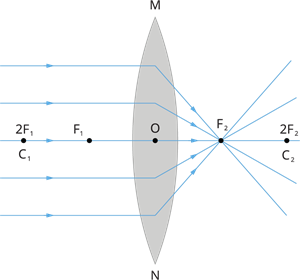
Object at infinity

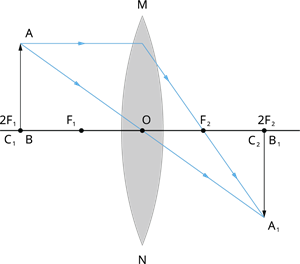
Beyond \(2\)
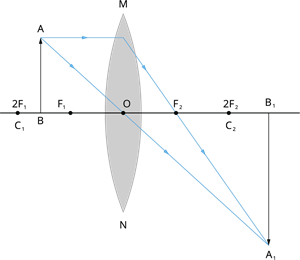
At \(2\)
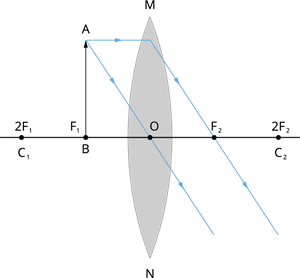
Between and \(2\)
At focus

Between and \(O\)
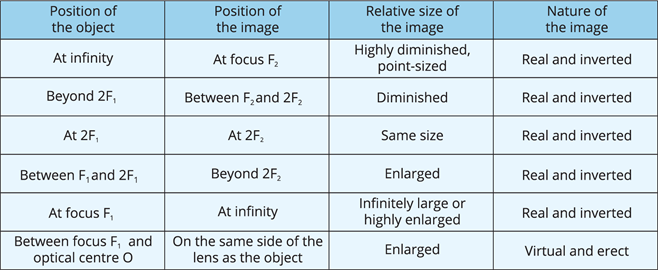
The nature, position and relative size of the image formed by a convex lens for various object positions are summarised in the table below.
 Register for free to see more content